Twin ‘T’ CW (Morse) Practice Oscillator
For a while now, I’ve had need of an easily portable oscillator to be able to practice Morse Code or give the occasional lesson. Recently, I have also discovered Network Radio and all the delights of chatting to people all over the world. I have been asked several times for lessons/workshops utilising the Network Radios channels.
To this end, I had a good search around and eventually found a design by Michael Maynard (K4ICY) of a Twin ‘T’ oscillator. On his page, he pairs it with a simple transistor amplifier, but I wanted to get a little more volume. I rooted around and found a circuit utilising an LM386 and added it to Michael’s oscillator design. The resultant circuit looks like this:
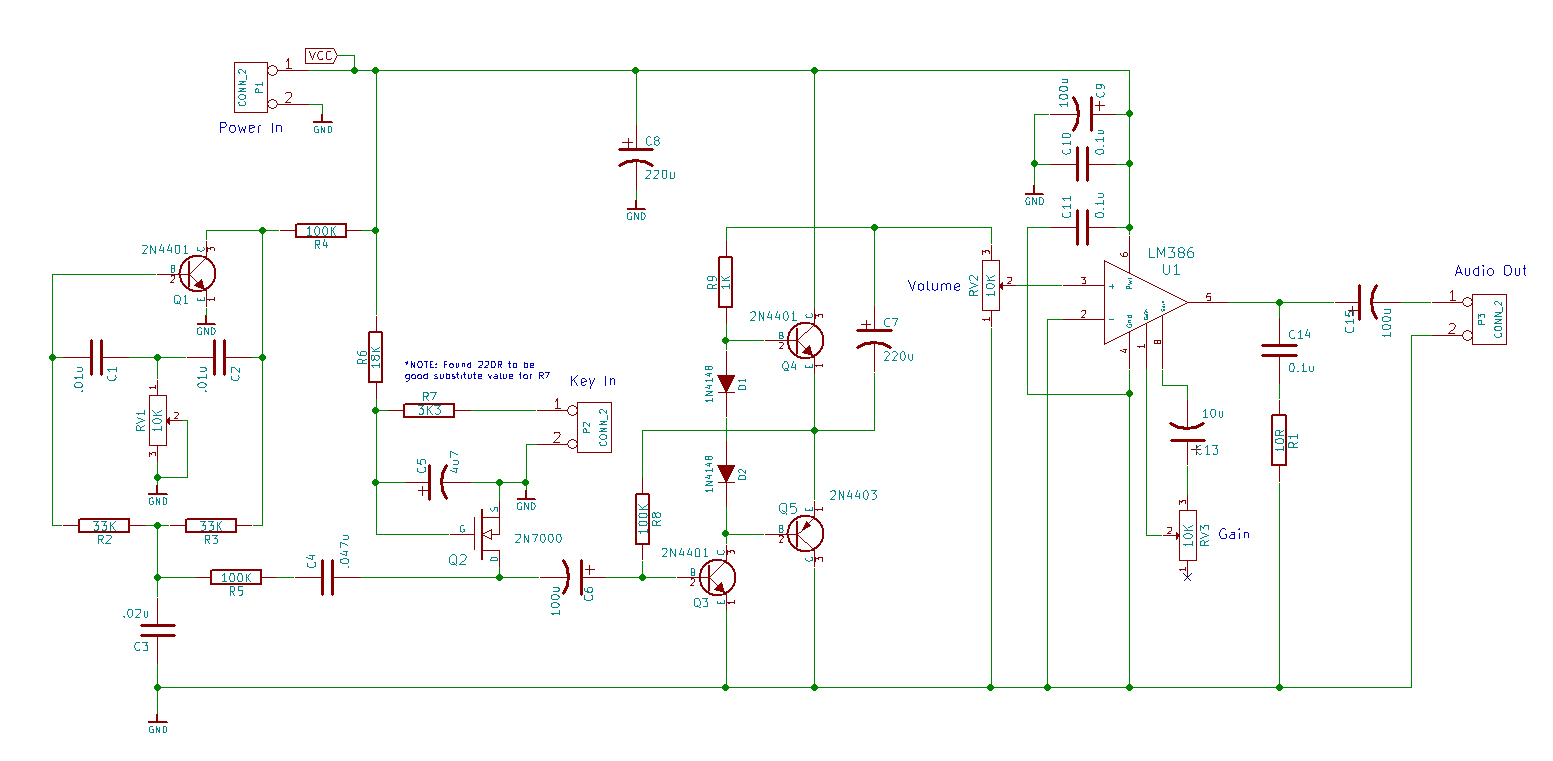
CW Practice Oscillator v2.00 Schematic
PDF Version available with other files below (And also details of the uncased StAR edition). Michael’s oscillator is simply fed into the LM386 via a 220uF capacitor. I found the original wave shaping to be a little aggressive for my tastes so I substuted R7 for a 220R resistor. This changed the attack and created a much more reactive tone for me. You may need to experiment to find a value that works in your own builds.
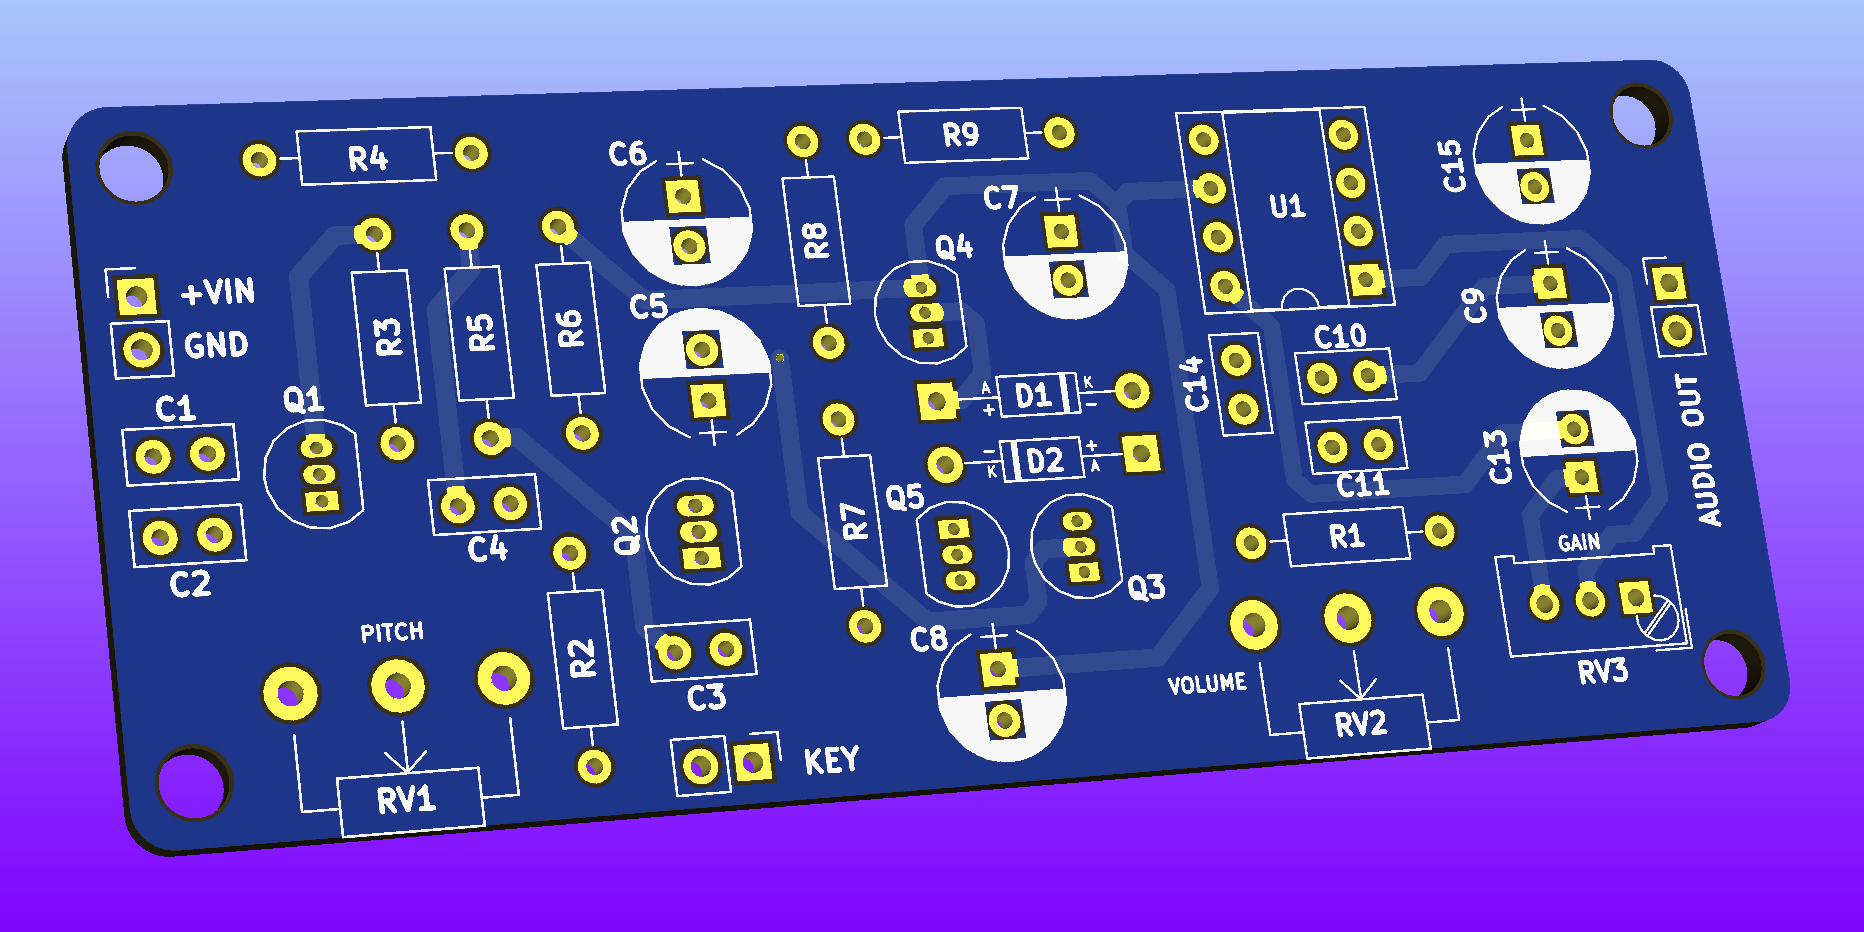
CW Practice Oscillator v2.00 KiCad 3D Front
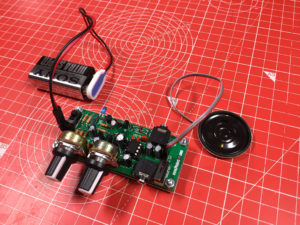
The pcb is laid out pretty much the same as the schematic. I included the potentiometer RV3, but I find it is wound all the way up to drive the 8ohm speaker I am using on the prototype. For speed, I soldered the pitch and volume pots directly to the board, but this was just for speed of testing. When I house the board in a case, I will mount the controls on the case and run wires appropritely.
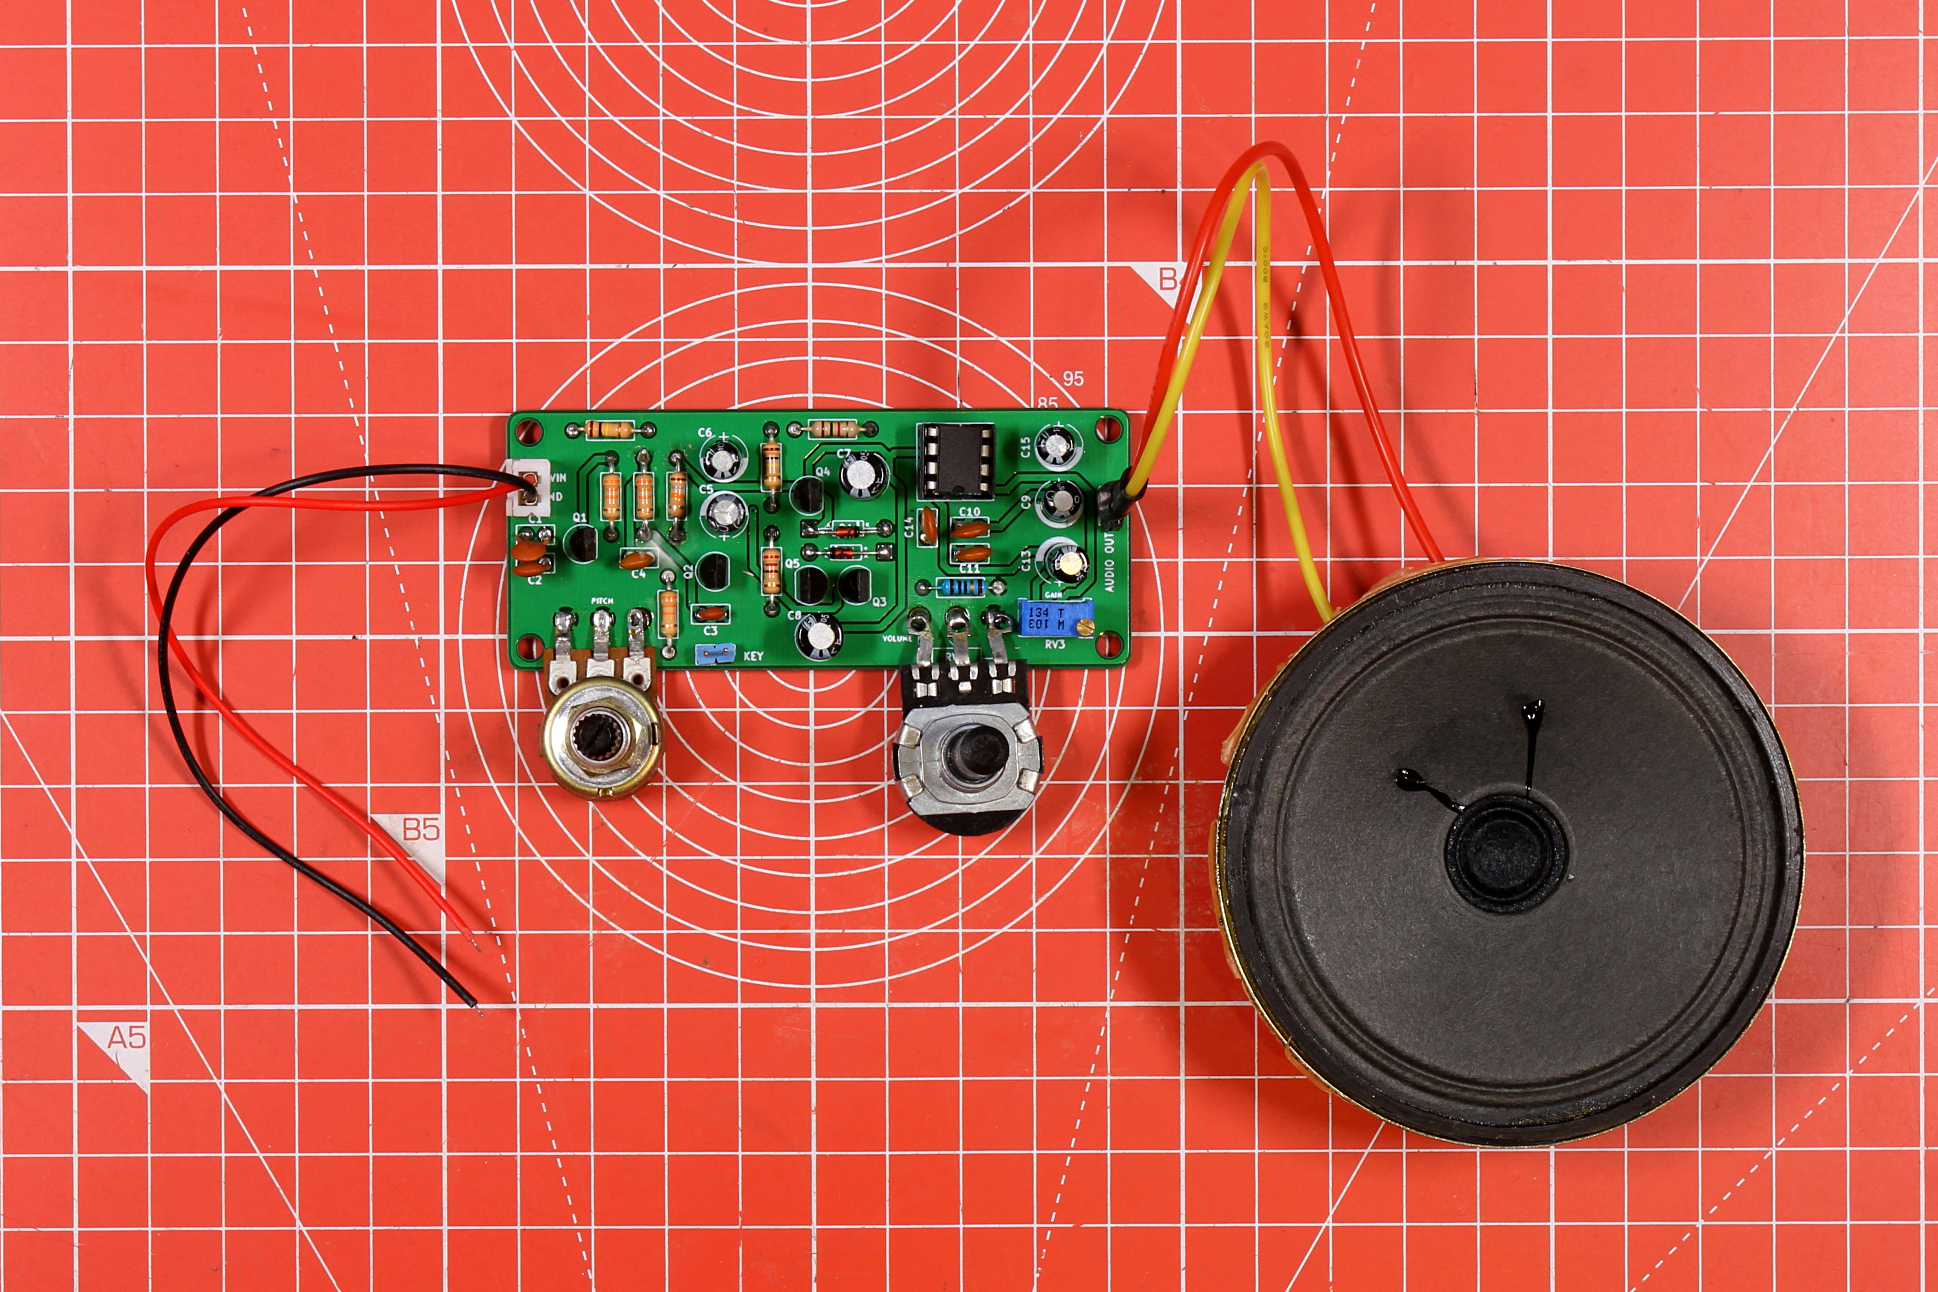
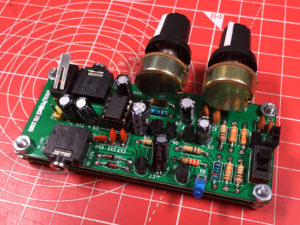
CW Practice Oscillator v2.00 Prototype
The circuit runs happily on 9V. I tested it with a bench power supply but it works equally well when powered by a standard PP3 9V Battery.
Here are all the files for fabricating the CW Practice Oscillator v2.00:
- CW Practice Oscillator v2.00 PCB .SCH schematic file
- CW Practice Oscillator v2.00 PCB .PCB board file
- CW Practice Oscillator v2.00 PCB .PRO file
- CW Practice Oscillator v2.00 PCB .LIB file
- CW Practice Oscillator v2.00 PCB Gerbers .ZIP file
- CW Practice Oscillator v2.00 PCB Schematic .PDF file
- CW Practice Oscillator v2.00 PCB Images .ZIP file
- CW Practice Oscillator v2.00 PCB BOM .TXT File
Please note, due to the way the website server stores and accesses files, I have added underscores to filenames.
On Michael’s site, he mentions the possibility of the transistors getting hot. I haven’t noticed this on my prototype as yet but it may be because I have only tested it in brief sessions. It’s certianly something to bear in mind.
I housed my unit in an ABS Instrument case 140x110x35mm I found on eBay. I also purchased a 9V battery compartment to keep things neat. The front panel was printed on a laser printer on standard A4 photocopy paper. I used spray adhesive to affix the case panel to the paper. To line it up, I suspended the A4 sheet on a window so I could see the guide rectangle through it.
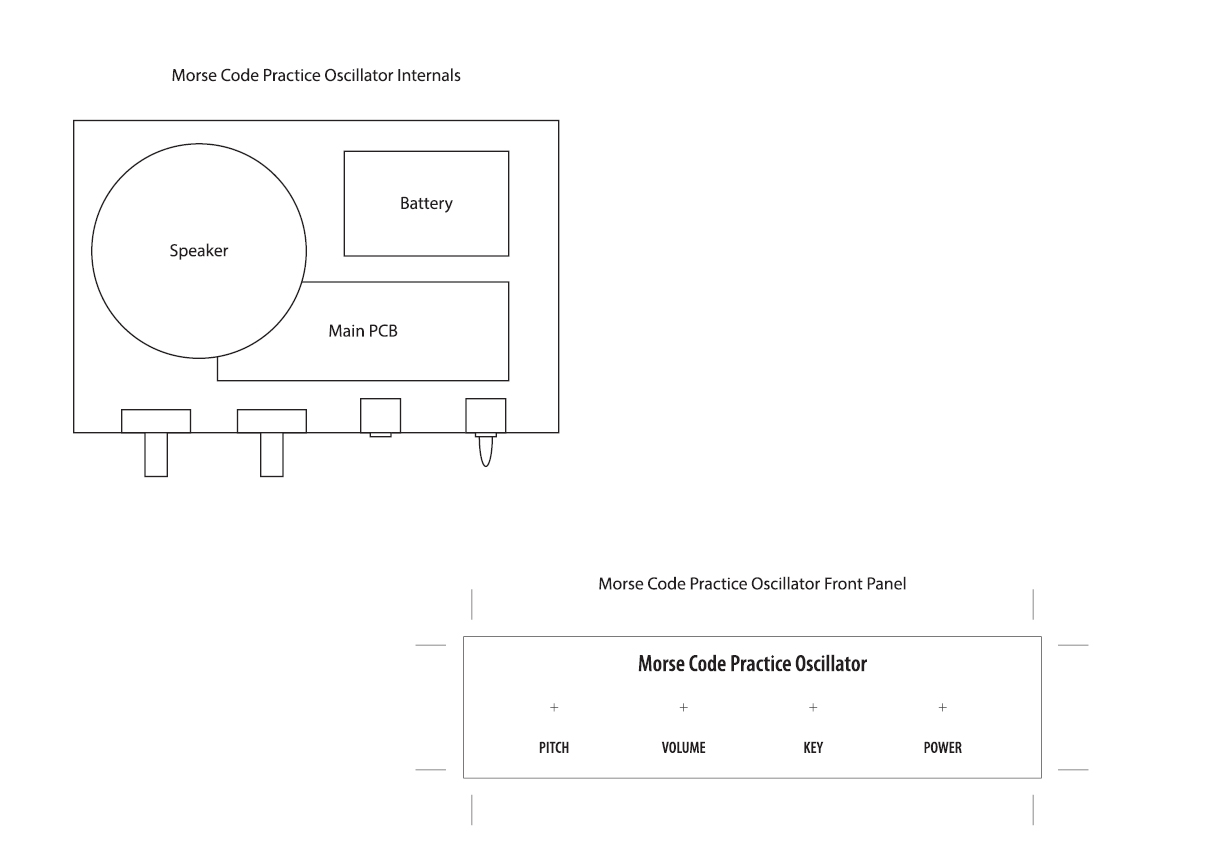
CW Practice Oscillator v2.00 Front Panel
Download the PDF from HERE. Remember to print at 100%. I also used a paper template to drill the holes for the speaker mounted on the top of the case After drilling, I carefully peeled away the template and cleaned off the residual glue.
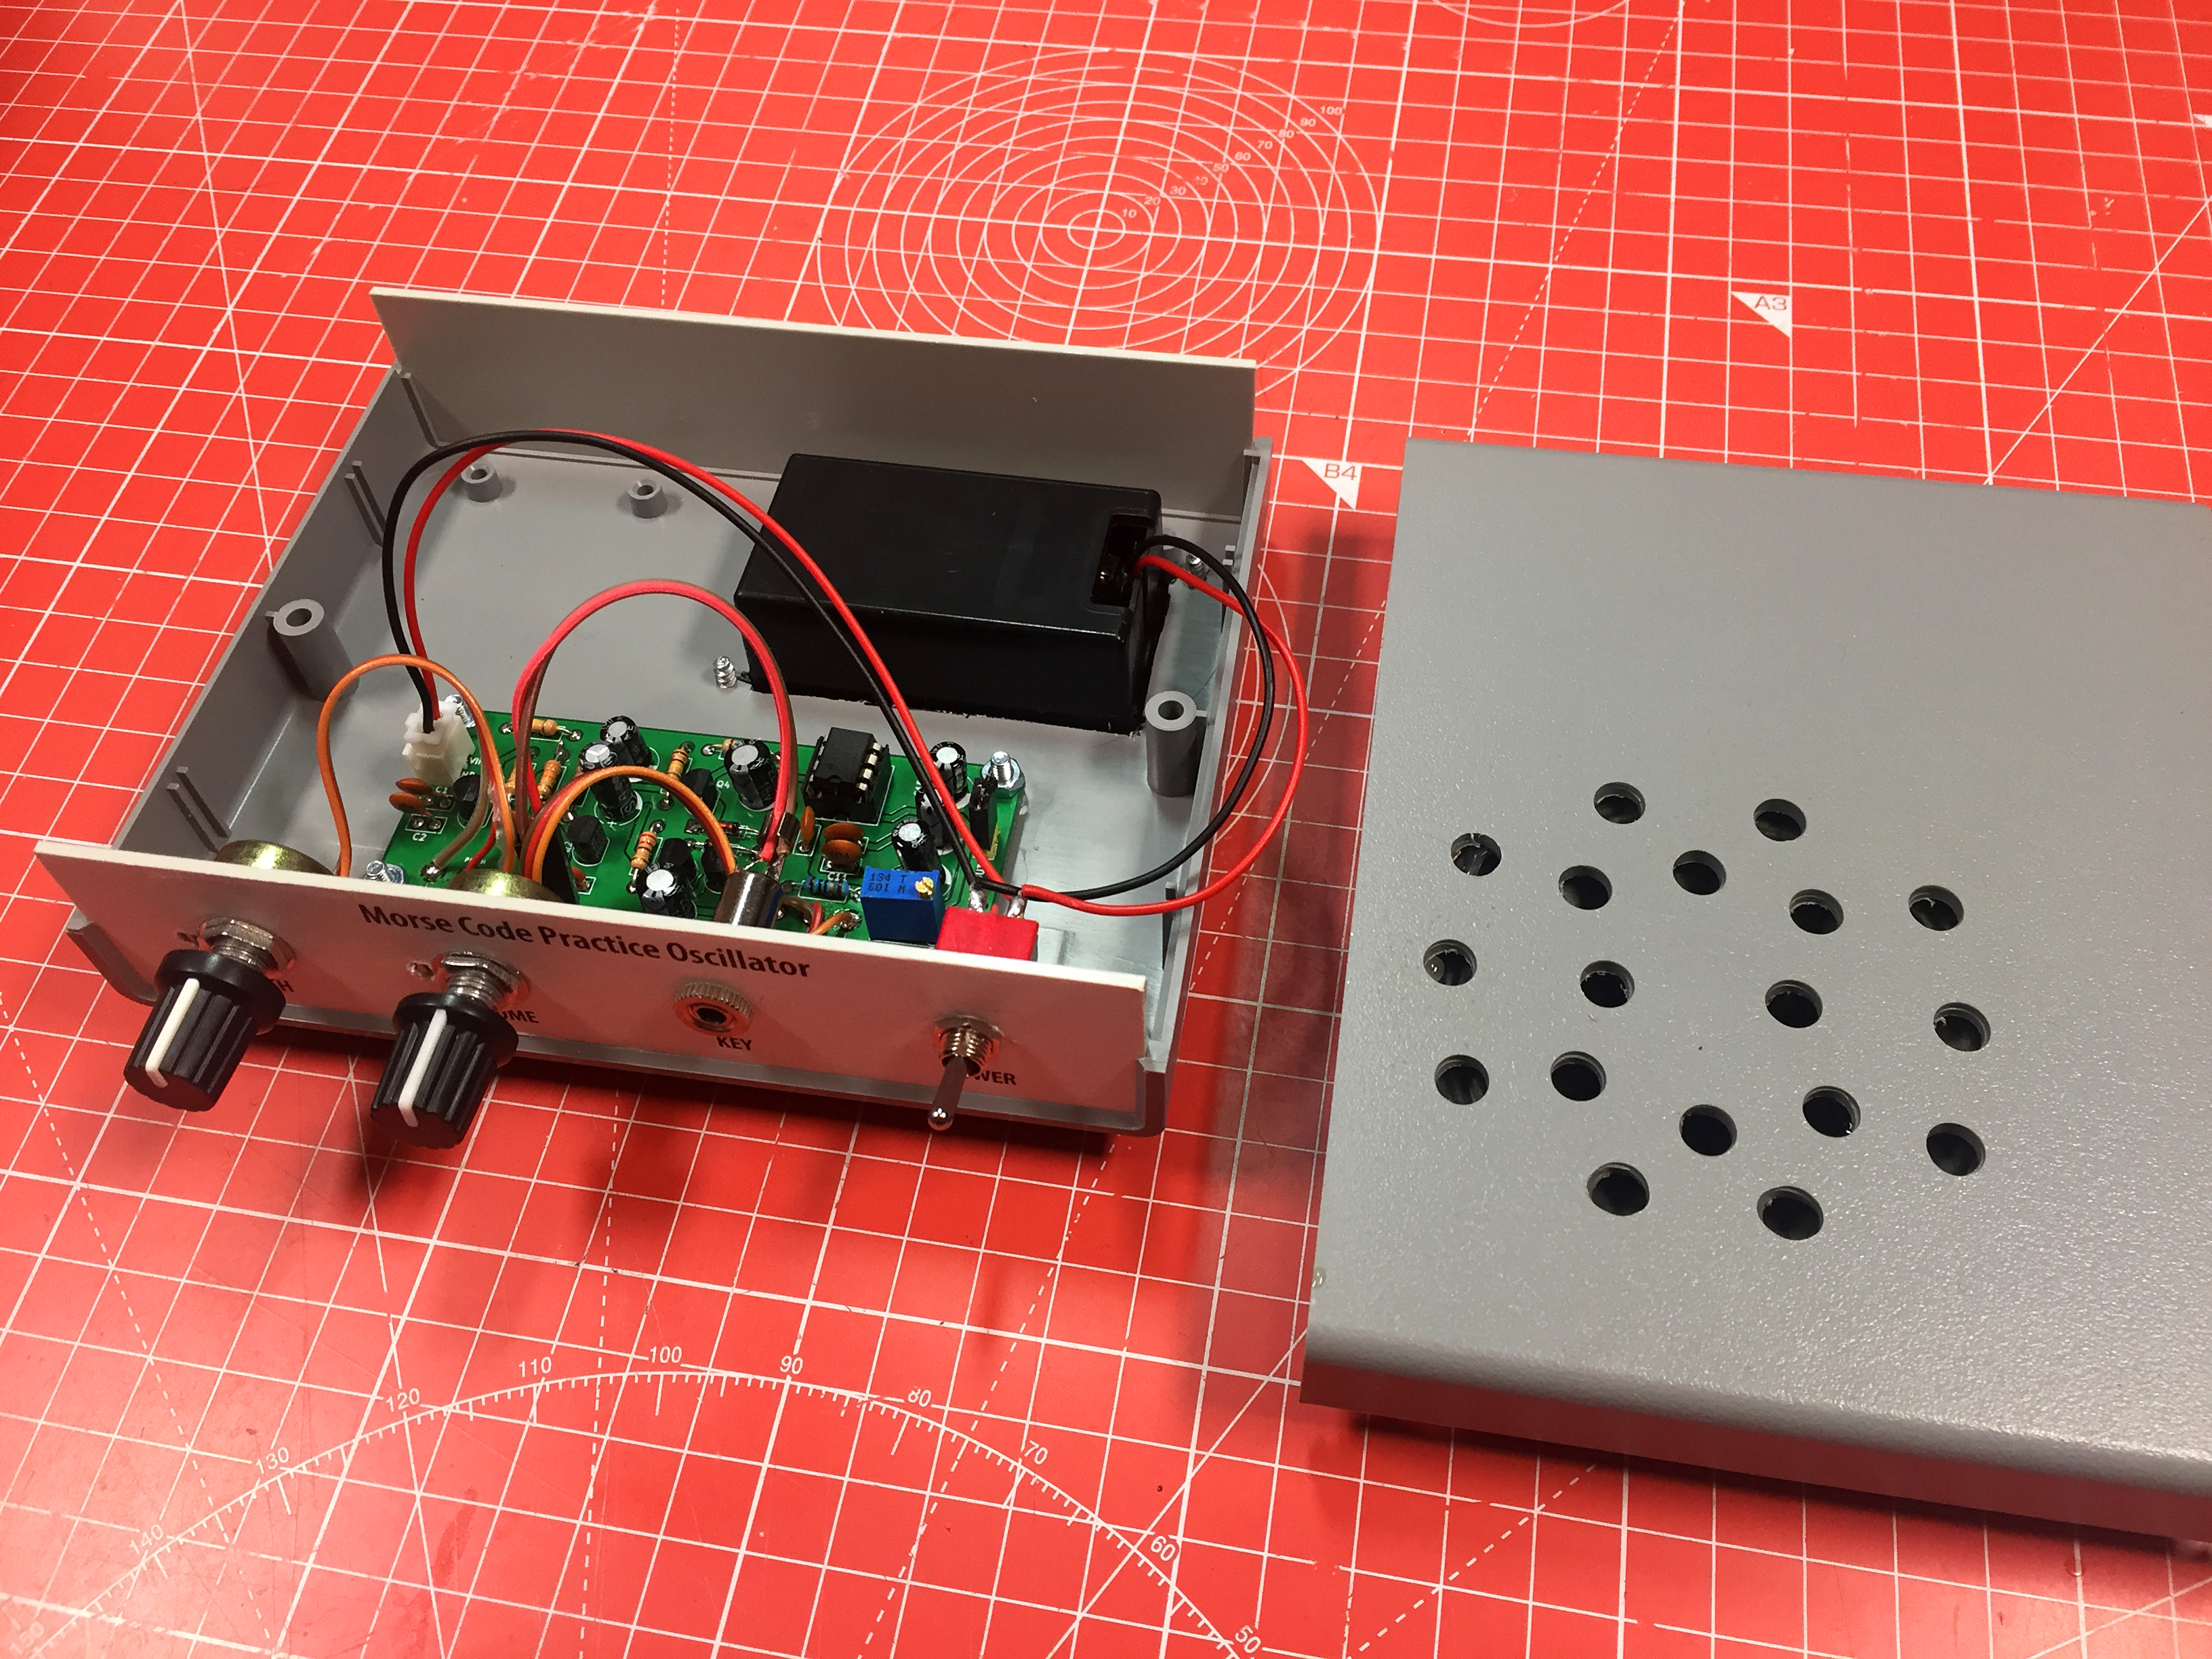
CW Practice Oscillator Internals

CW Practice Oscillator Internals from the Rear
It is a tight fit but everything is cleared and there is just enough space to close the case. I put two large rubber feet on the bottom front corners of the case and two smaller ones on the rear. This inclines the case slightly upwards.

Completed CW Practice Oscillator
This will be a useful piece of kit to have around the shack and also to use if asked to help out a fellow ‘Ham’ learn the code.
StAR Edition
Whilst I was developing v2.00, I was asked by my colleague Phile G3MGQ, if I might develop a special version for the students to build at our after school radio club at St. Richards Catholic College. And so was born the StAR Edition. The requirements were:
- To make it useable without the need for a case
- To have an LED for silent, cross-classroom comms
- To include sockets for both Key and Audio
- To include a micro-switch key for ad hoc practice etc.
I have managed to include all these features in the new version, although it did take a few iterations to get there!
Morse Practice Oscillator v2.05 StAR Edition
I have noticed that a larger speaker sounds a lot better than the small one I have used for testing but it is OK in a pinch. Headphones can be used through the socket on the front of the unit but remember to turn the volume all the way down before starting. I have found that there is a small amount of transistor noise, given off by the LM386 no doubt, but it is low enough not to be annoying.
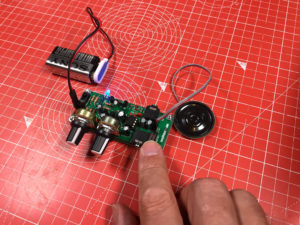
Silent LED Comms
The Blue LED lights up well but any colour 3mm LED should be fine.
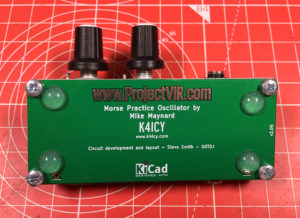
CW Practice Oscillator v2.05 StAR Edition Base
I have included a credit for Mike Maynard K4ICY on both the main board and the base. Mike’s original “Pleasent Code Practice Oscillator” inspired me to develop his idea since it was a device creating a nice sine wave output, and not a raspy square wave which most Morse Practice Oscillator’s use.
CW Practice Oscillator v2.05 StAR Edition Rear
The board can be made up in exactly the same manner as the cased version. Start with the lower profile components like resistors, diodes etc. And work up in size until complete. I find it very useful to have a bit of sticky tack (Blu/White Tack) handy for keeping components in their place whilst soldering. Mind the diodes which are pointing in opposite directions!
Here are all the files for fabricating the CW Practice Oscillator v2.05 StAR Ed.:
- CW Practice Oscillator v2.05 StAR Ed. KiCad .ZIP file
- CW Practice Oscillator v2.05 StAR Ed. Main PCB Gerbers .ZIP file
- CW Practice Oscillator v2.05 StAR Ed. Base PCB Gerbers .ZIP file
- CW Practice Oscillator v2.05 StAR Ed. Schematic .PDF file
- CW Practice Oscillator v2.05 StAR Ed. Images .ZIP file
NOTE: Put Main PCB and Base PCB files in seperate drectories!